Laminate Bearing Strength Test Fixtures (ASTM D5961, procedures A, C, D)
Model No. WTF-LB-D5961 (A, C, or D) (Stainless Steel)
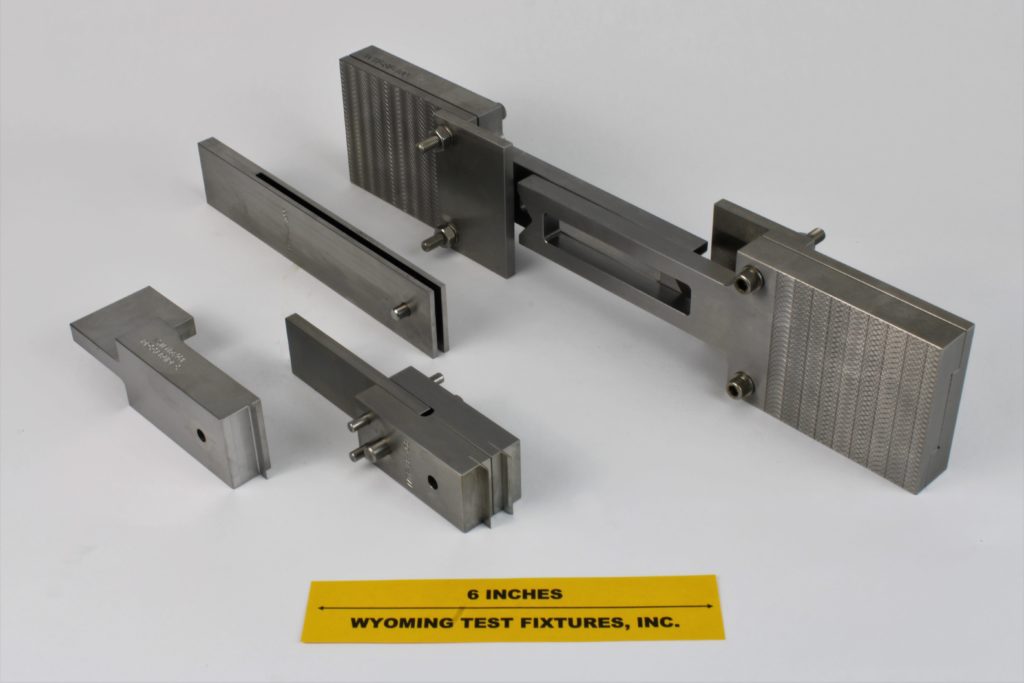
Fig. 1: ASTM D 5961 Fixture Configurations A (upper center), B (right), C (left), D (lower center).
ASTM Standard D5961 (Reference 1) includes four distinct laminate bearing test methods, identified as Procedures A, B, C, and D and shown in Fig. 1. Procedure B is actually a specimen support fixture and is described on its own page of this website. The other three procedures are pin bearing fixtures, as will be described here.
PROCEDURE A: DOUBLE-SHEAR TENSILE LOADING
Procedure A in ASTM D5961 is intended for testing composite laminates in double shear. That is, the pin in the fixture attempts to shear out a segment of the composite laminate test specimen by creating two shear planes in the pin. The standard test specimen is 5.5” long and 1.5” wide, with a specified thickness in the range of 0.125” to 0.208”. A 1/4” diameter pin or fastener is used.
This simple test fixture is shown in Fig. 2. The two halves of the fixture are separated by a spacer (not provided) of the same thickness as the specimen being tested. Obviously, a piece of the same test material can be used as a spacer, if desired. The test specimen is pinned in the other end of the fixture using the 1/4" diameter hardened steel pin provided, or the users lightly torqued (20-30 in-lb) fastener, if desired. Since a raised boss is present at the pin hole, the opposite end of the fixture is thicker by an equal amount so that the specimen is uniformly supported when gripped.
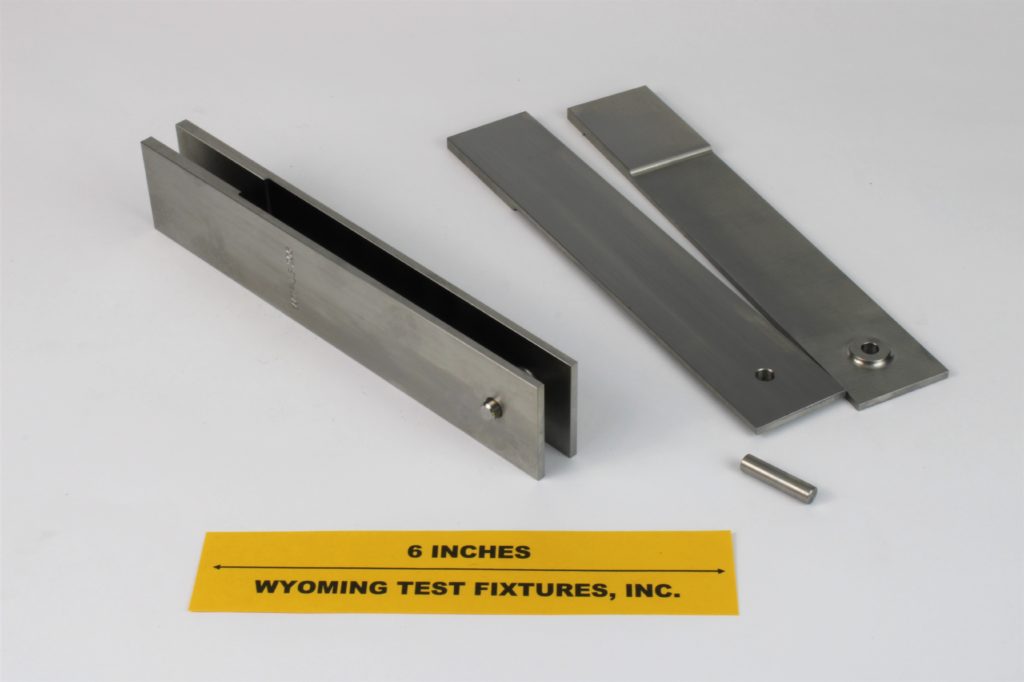
Fig. 2: Standard ASTM D5961 Procedure A Fixture, shown assembled on left and disassembled on right.
The end of the fixture with the spacer in place is gripped in a standard tensile wedge grip. Each half of the fixture is 0.2” thick; thus this grip must have an opening range to accommodate 0.4” plus the spacer (specimen) thickness. The free end of the specimen is held in a second tensile wedge grip.
A tensile load is applied until a maximum loading has been reached, monitoring both applied force and hole deformation, as described in the ASTM standard.
Sometimes the customer has a requirement to test non-standard specimen sizes, requiring Wyoming Test Fixtures, Inc. to custom-design and fabricate a special test fixture. An example is shown in Fig. 3.
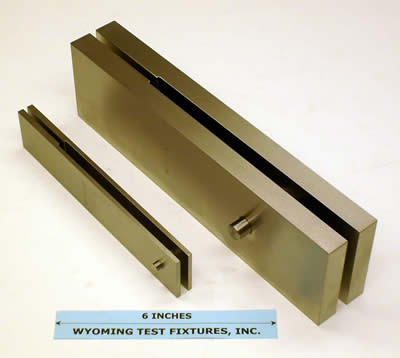
Fig. 3: Standard ASTM D5961 Procedure A Fixture (left) and special large-scale fixture with 1/2" diameter pin (right).
An alternate version of the test fixture shown in Figs. 1 and 2 that also satisfies all of the requirements of ASTM D5961 is the so-called SACMA test fixture (see Section H-2 of this catalog, and Reference 2). As described in Section H-2, the SACMA fixture is much easier to use since the specimen holder is one piece, with adjustable bushings to accommodate variations in specimen thickness.
PROCEDURE C: SINGLE-SHEAR, TENSILE LOADING
Procedure C of ASTM D5961 loads the laminate bearing specimen in single shear. That is, a single shear plane is developed in the loading pin as the tensile load is applied. The test fixture is shown in Fig. 4.
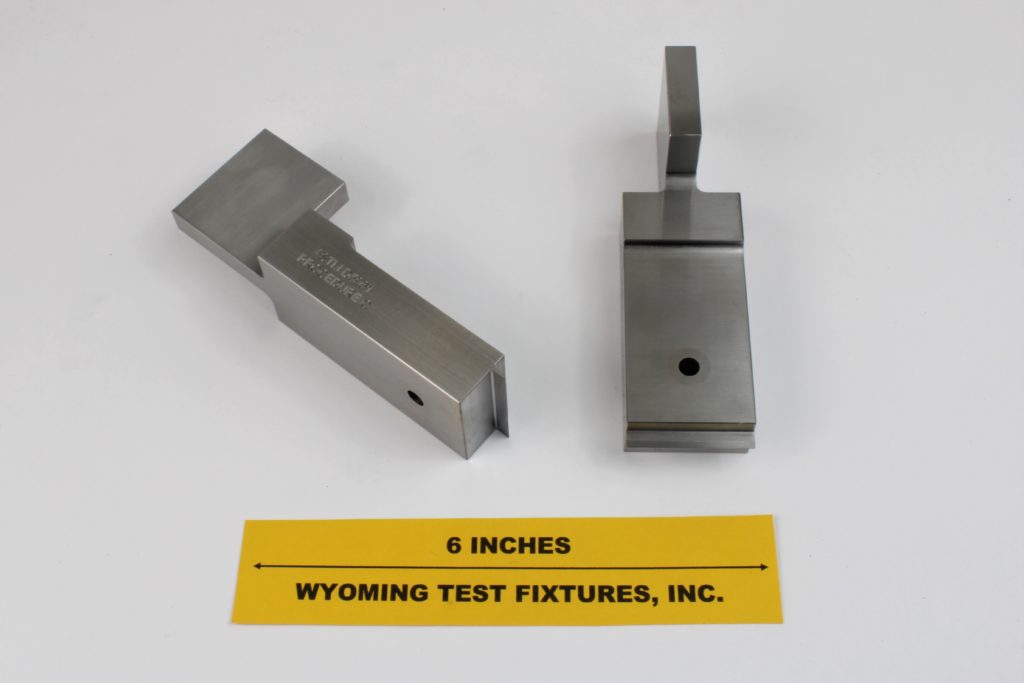
Fig. 4: Standard ASTM D5961 Procedure C Fixture
The specimen is placed on the right surface of the test fixture, aligning the hole in the end of the specimen with the hole shown in the fixture and a fastener inserted and lightly torqued. Or a pin can be used. The flat tang at the top of the test fixture is gripped in a wedge grip and a tensile force is applied to the lower end of the specimen. The maximum force attained and the deformation of the hole in the specimen are recorded.
PROCEDURE D: DOUBLE SHEAR, COMPRESSION LOADING
Procedure D of ASTM D5961 loads the laminate bearing specimen in double shear through a close-tolerance, lightly torqued fastener (or pin). The fixture is shown in Fig. 5.
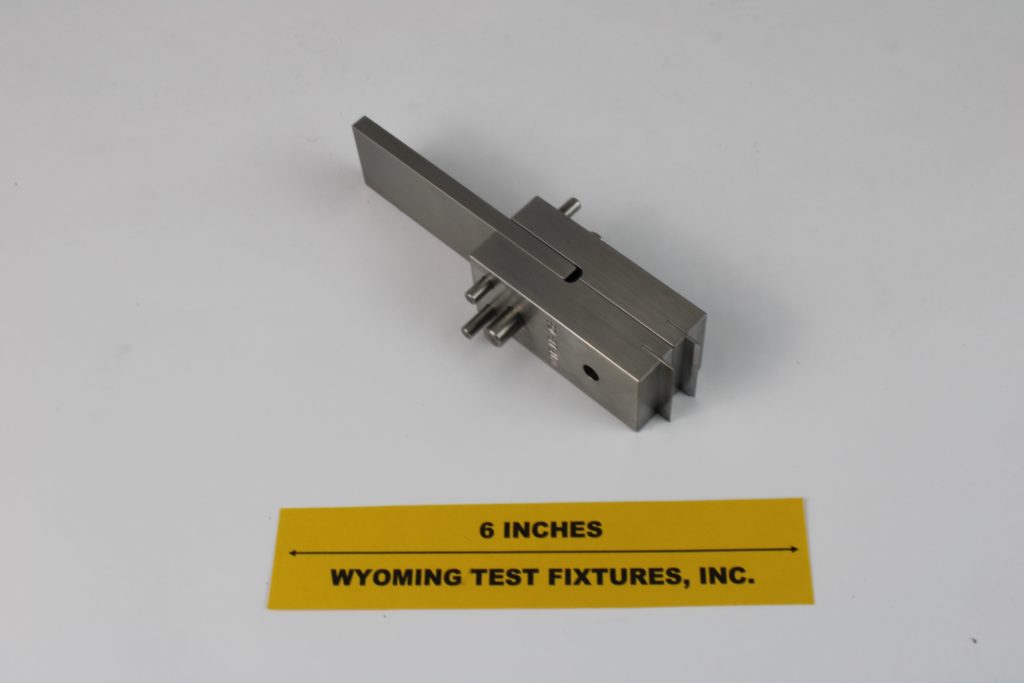
Fig. 5: Laminate Bearing Test Fixture Procedure D (ASTM D5961)
The two lower components of the fixture are spread apart to permit inserting the 1.50" wide laminated composite specimen, aligning the 1/4" diameter hole near the end of the specimen with.the holes in the fixture. A pin or fastener is inserted in the hole, the fastener being torqued as desired. The upper end of the fixture is held in a grip, as is the lower end of the test specimen. The specimen is kept short enough to avoid buckling. A 5.5" long specimen is specified in ASTM D5961. The applied compressive loading induces a double shear in both the specimen and the loading fastener (or pin). Load at failure and hole deformation are measured.
Source of Additional Information:
1) ASTM Standard D5961/D5961M-13 (2013), "Bearing Response of Polymer Matrix Composite Laminates," American Society for Testing and Materials, West Conshohocken, Pennsylvania (first issued in 1996).
2) SACMA Recommended Method SRM 9-89, "Bearing Strength Properties of Oriented Fiber-Resin Composites," Suppliers of Advanced Composite Materials Association, Arlington, Virginia, 1989 (now discontinued).

